41 magic knot knitting diagram
The technique MAGIC LOOP can be used - you then only need circular needle of 80 cm in each size. ... See diagram A.1. KNITTING TIP: ... KNOT: Make a knot at the top of every Santa hat in A.1. Tie the knot around a stitch. Cut 2 lengths of colour off white. approx. 10 cm. Place strands together, use a needle and pull strands through the top ...
Double Half Hitch. A double half hitch knot is just a half hitch knot repeated a second time. Start with a Lark's head knot. Take one cord and make a number 4. Loop that cord through the "4" hole and pull tight. Make another number 4 using the same cord you used before.
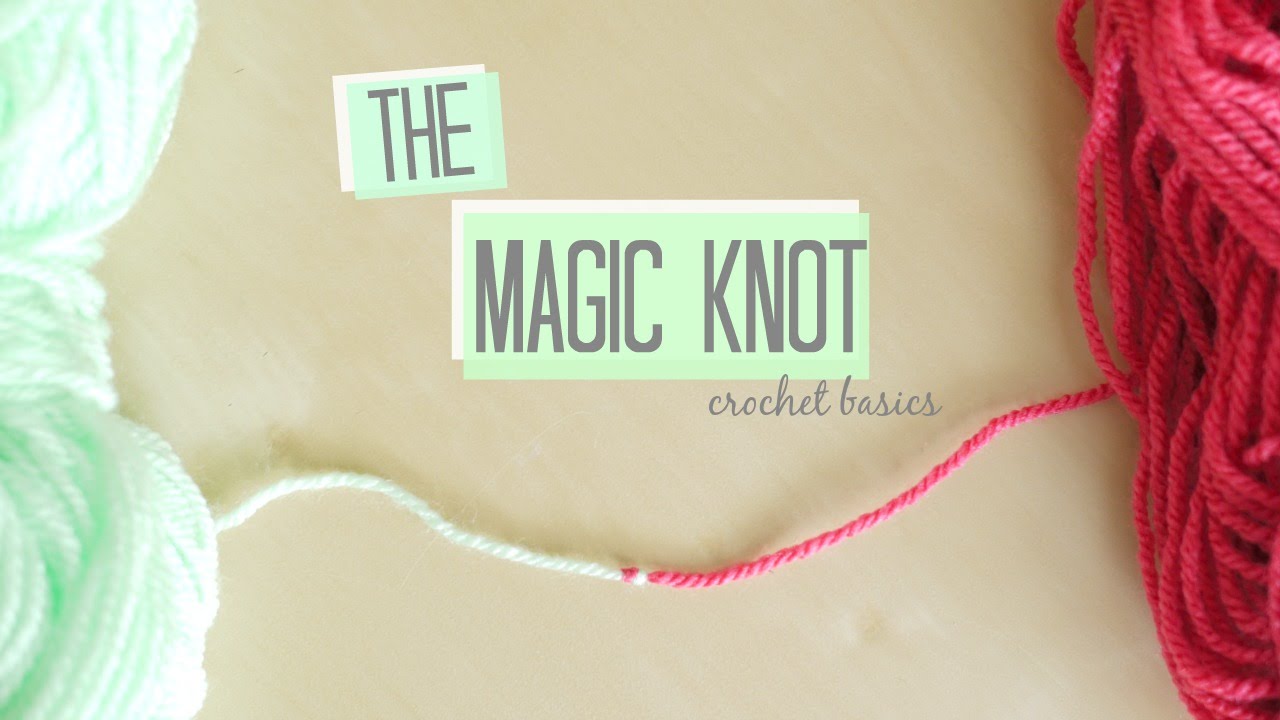
Crochet Basics: The Magic Knot. Digging through my YouTube channel can get a little tricky to find what you are looking for, so I created a tab at the top of the blog called "Crochet Basics" and as I complete new short videos for this library, I will add the content there and as a blog post. If you have any requests for these, leave them in the comments section ;).

Magic knot knitting diagram
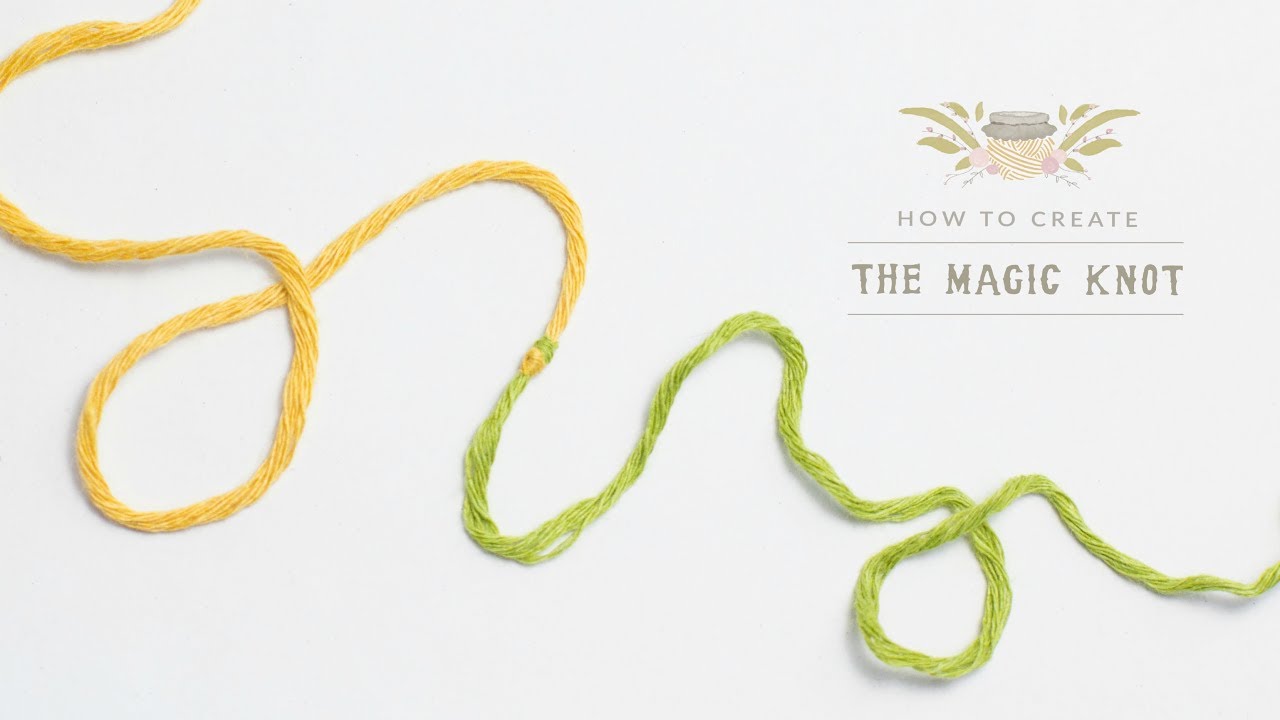
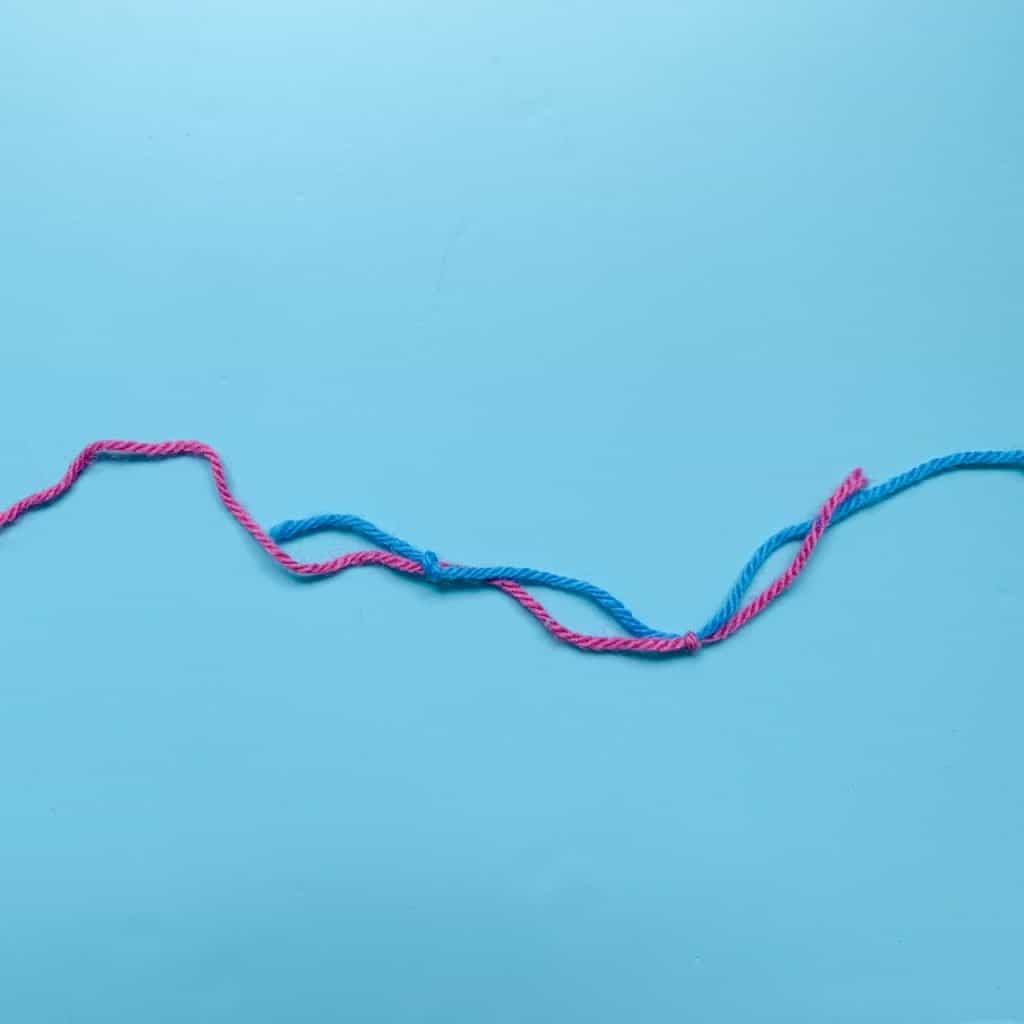
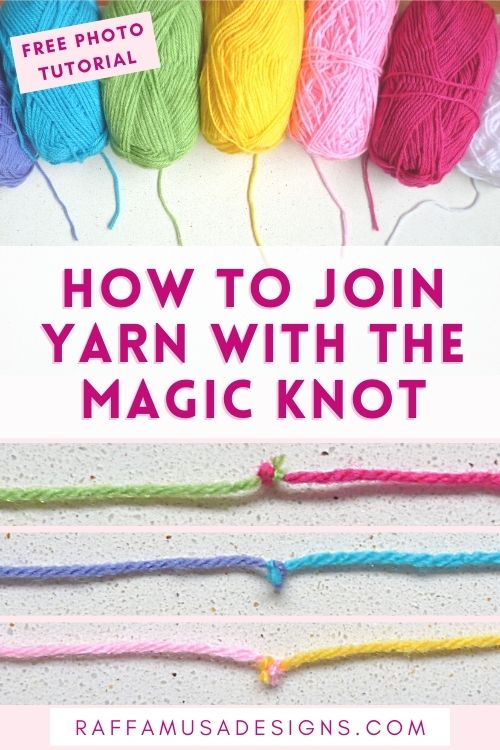
The magic knot technique can either be used for you need to change color or to add more yarn. To begin you'll need two strands of yarn. Follow the visual tutorial below and learn how to make this fabulous and so popular Magic Knot. ===== How To Join Yarn Using The Magic Knot Technique. Head over to Create Laugh Grow for the full tutorial on ...
The Crochetville forum was founded in 2004 as an online place for crocheters to gather and encourage each other. Everyone is welcome, from the self-taught beginner to the experienced crocheter. Members can get help with a crochet question, join in on a crochet-along , show-and-tell projects, and more. Crochetville is woman-owned by two lifelong ...
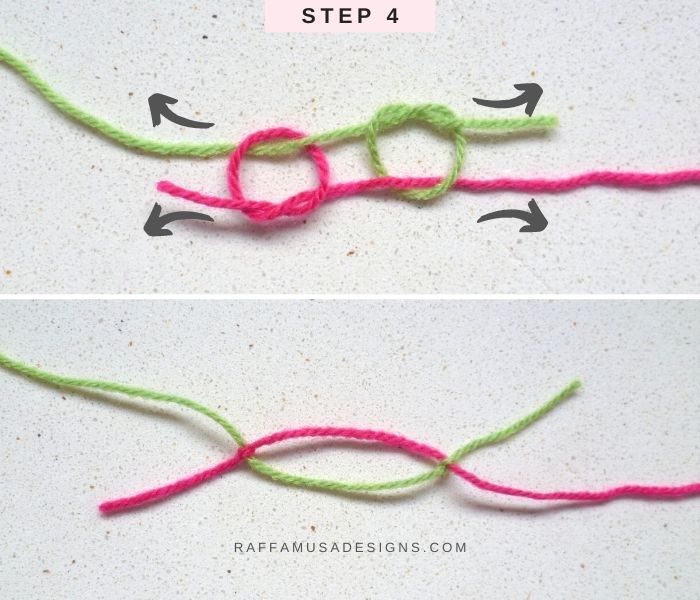
Step 4: Grab each yarn from the part coming from the ball and slide the knots together. Step 5: Test the knot by pulling tightly at it. It shouldn't fail. If it does, something wasn't done right with your knots. Do it again. Step 6: Once it's passed the pull test, trim the tails very close to the knot. When you're done, pull again to ...
Magic knot knitting diagram.
Uses: The Slip Knot (ABOK # 529, p 87) is identical in structure to the Noose Knot except that the bight to be inserted is formed from the short end - not the long. The Slip Knot is one of the most frequently tied knots - being used in knitting as the first loop when casting on - where it is called a slip knot but frequently tied as a noose.
3. Flip the loop back down so it lays on top of the rest of the yarn. Make sure you flip it towards the side with the rest of the yarn, not the side with the end of the yarn. 4. Pick up the yarn inside the loop and pull it through. Simply pinch the straight line of yarn underneath your loop and pull it through 1-2".
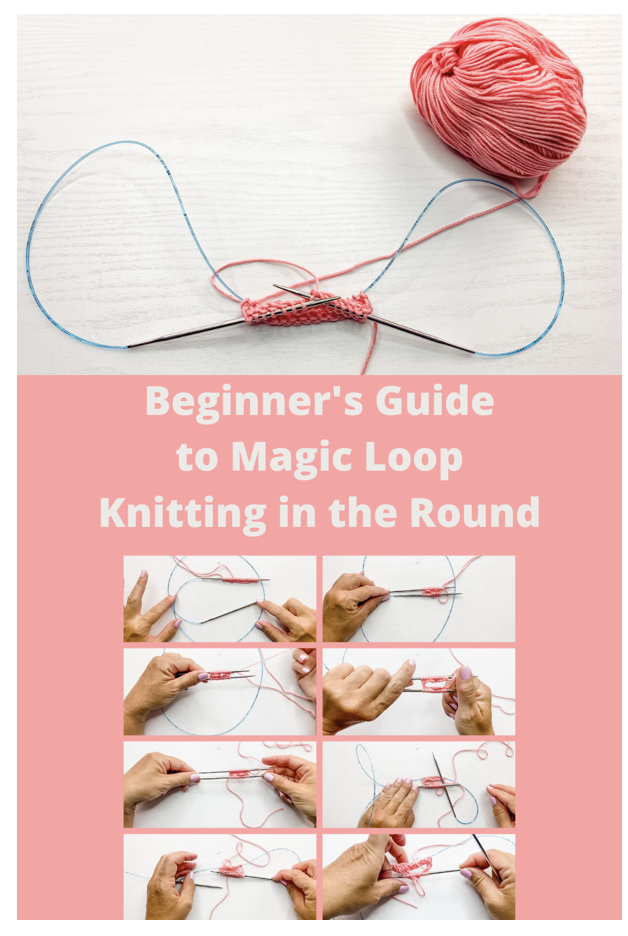
Magic Loop Knitting Tutorial. Begin by casting on the required number of stitches. Divide the stitches, then pull your cable up between the centre. Pull the stitches onto the needles, so they are no longer on the cable. Turn the needles so that the first stitch cast on, is on the needle closest to you. You can then move the tail of the yarn to ...
Knit 1 round, then work rib (knit 2, purl 3) in the round for 4 cm. Now decrease 1 stitch in each purled section by purling 2 together = 80-84-88-92-96-104 stitches. Continue the new rib (knit 2, purl 2) until the neck measures 12 cm. Change to circular needle size 5 mm. YOKE:
A knitting chart is simply a visual representation of the knitting project shown from the right or front side. You work it just as you would the knitting project. It begins at the lower right-hand corner and you work across the row from right to left, just as you do when knitting it. If the project you are working is knit flat, the second row ...
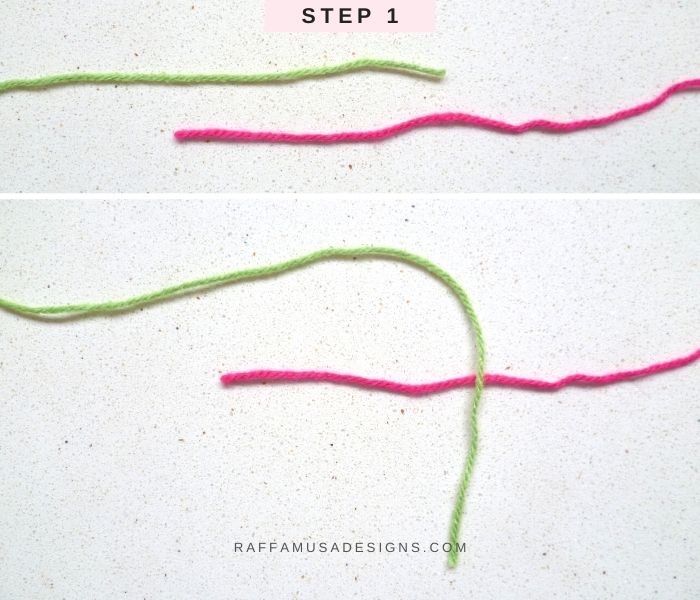
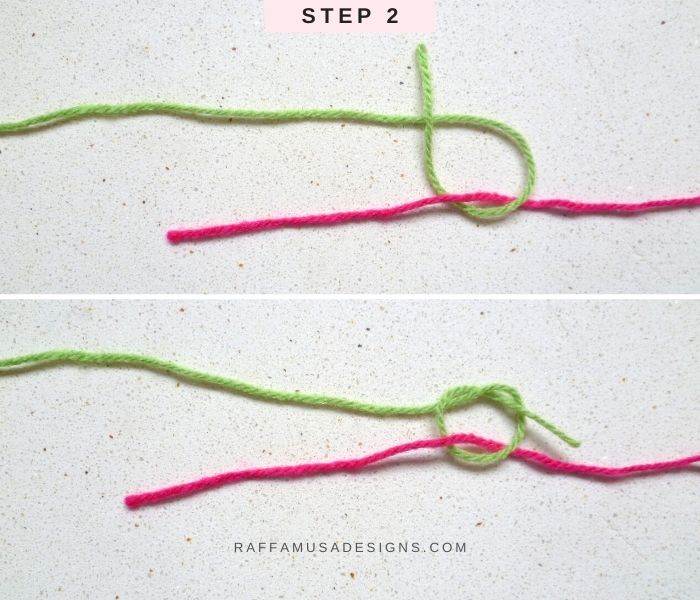
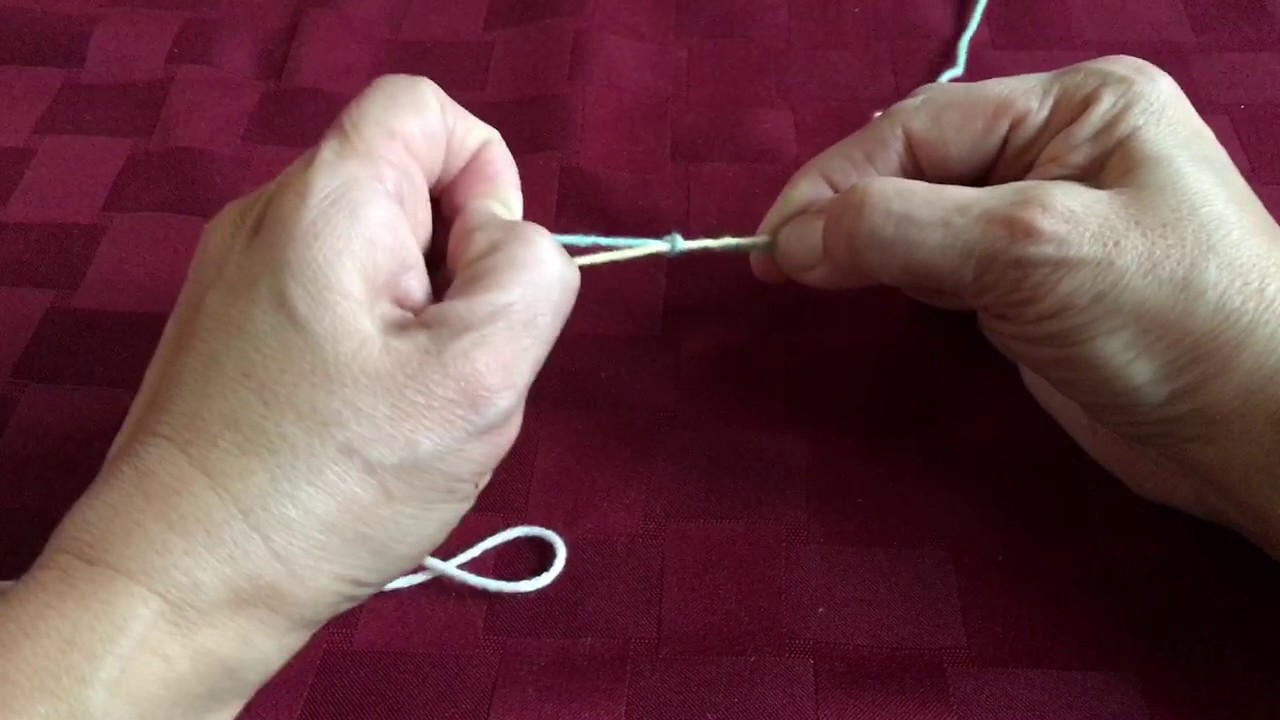
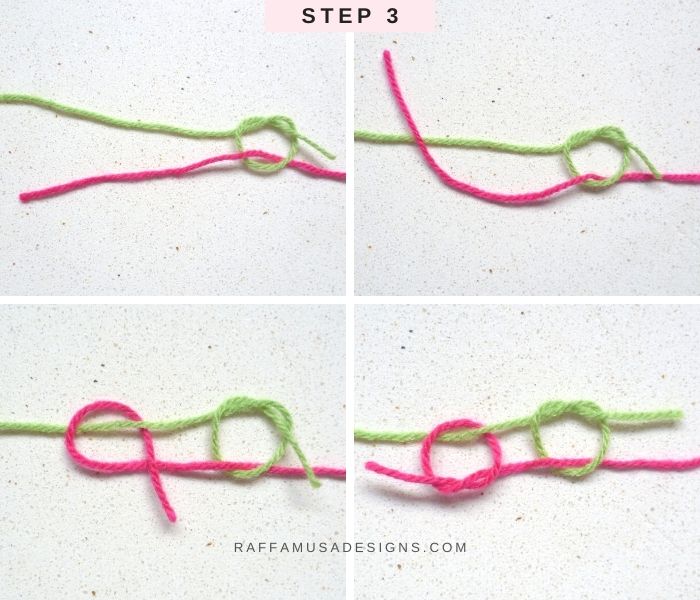
Magic Knot - Tutorial Step 1. Place the two ends of yarn one above the other as shown in the figure below and fold the yarn on the top (green in the picture) over the other (pink).
Pull the yarn into loop and tighten the knot. You get the sliding loop. Method #3 - Sliding Loop or Magic Ring. Wrap thread around index finger a twice. Take a formed ring off the finger and grab it with thumb and middle finger of the left hand. Grab the working yarn with the hook and pull it through ring.
Mar 30, 2019 - Explore Janice Fendrick's board "joining yarn crochet" on Pinterest. See more ideas about joining yarn, yarn, crochet.
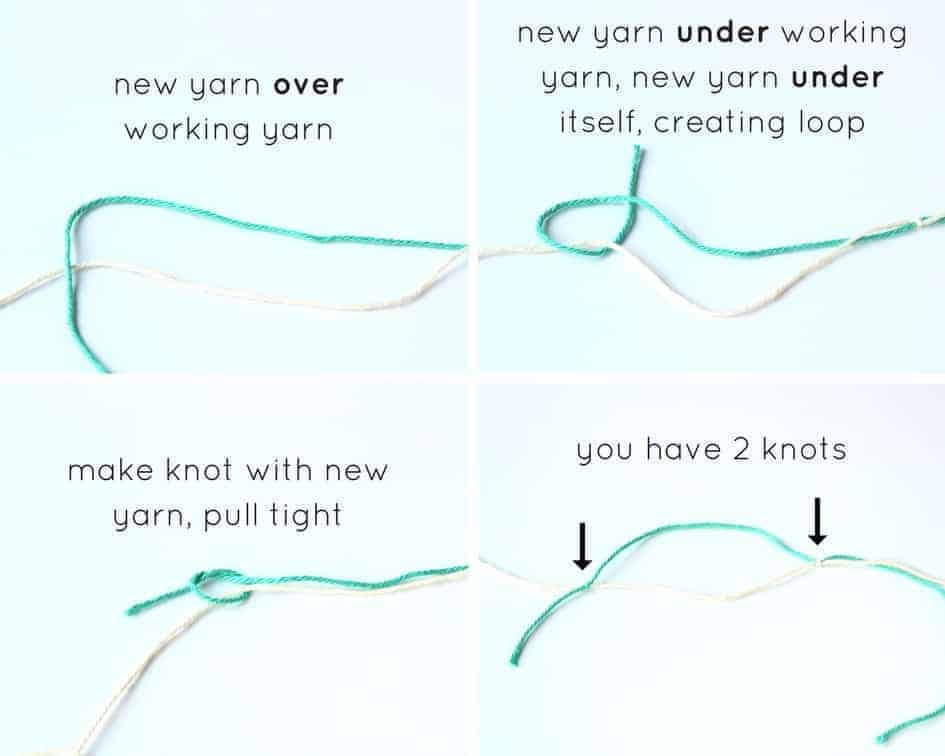
Make a loop with the yarn tail to your left, making the strand go under itself. 2. Introduce the left yarn tail through the loop formed on the last step, bottom-up. 3. Now, pass the yarn tail from the left under the yarn tail from the right, and then through the loop of step 1. 4. Pull strongly from both yarn tails to close and secure the knot. 5.
In medicine, a surgeon's knot is used to secure suture threads during surgical procedures. However, it's also one of several types of knots useful for making jewelry and working with beads. It's similar to a square knot, but it has an extra pass-through on the first half of the knot.This makes the cords less likely to slip, both while you are tying the knot and once the knot is complete.
Start the Magic Circle by making a slip knot and putting it on your hook. Take your yarn tail and make a circle like the photo below. Treat that circle like a stitch and insert your hook into it. You want to make sure your hook goes under two strands of yarn. Yarn over your hook and pull a loop back through your circle.
We're talking about magic today folks! That's right. You heard me. Magic. This is a magic knot. If you knit or crochet and haven't had a chance to use this knot to join your yarn, I'm about to become your new best friend. If you're a crafter that has any project that requires you to join thread, yar
How to join yarn using the magic knot method
This knot is a bit larger than the Magic Knot and I recommend you put the knot at the back of the work. This may take some finessing to do (knitting a few stitches more loosely or more tightly) but it's definitely possible and creates a join that makes NO ENDS to weave in.

Magic knot - the easiest way to join a new ball of yarn in ...
Easy instructions on how to create the Magic Knot!BLOGhttp://www.hopefulhoney.com/YARN USED IN VIDEO Drops Cotton Light - http://www.lovecrochet.com/drops-co...

How to join yarn two ways - magic knot and russian join - you ...
The magic knot is used to join two separate strings or pieces of yarn. You may do this when you want to change color of your yarn or when you come to the end of one string and need to add more. It's ridiculously strong, small, and virtually indiscernible in the middle of most projects.
How to join yarn with the magic knot • free tutorial by ...
Magic knot knitting diagram. Slide your knitting needle or crochet hook into the loop and pull both ends of yarn tight. A slip knot almost always goes around something, as the beauty of the know is how easily it tightens and loosens around an object. Pull both the tail and standing line simultaneously to tighten your slip knot.
![tutorial] Magic Knot in 6 Easy Steps! Knotions Magazine](http://knotions.com/wp-content/uploads/2016/09/magic-join-6.jpg)
Tutorial] magic knot in 6 easy steps! knotions magazine
Tying a knot may seem like a simple skill to master, but the Magic No-Ends Knot Video Tutorial will teach you how to tie a special type of knot that does not...
![tutorial] Magic Knot in 6 Easy Steps! Knotions Magazine](https://knotions.com/wp-content/uploads/2016/09/magic-join-2.jpg)
Tutorial] magic knot in 6 easy steps! knotions magazine
How to Tie a Magic Knot — Create Laugh Grow. We're talking about magic today folks! That's right. You heard me. Magic. This is a magic knot. If you knit or crochet and haven't had a chance to use this knot to join your yarn, I'm about to become your new best friend. If you're a crafter that has any project that requires you to join thread, yar.

How to tie a magic knot — create laugh grow | magic knot ...
Thread the yarn tail through the eye of your yarn needle. With the yarn needle, pick up a strand of yarn on the back of the work close to the center of the circle. Wrap the tail yarn around the needle, and pull the needle through to make a knot. You can weave in the tail now, or wait until your project is finished.

Knitting help - magic knot
Choose a knot below, or scroll down for more information: Non-binding, quick and convenient stopper knot. Used to tie rope around an object and back to itself. Simple binding knot: first step of the Square (Reef) Knot. Creates a loop that tightens when pulled. Simple loop in rope's end - loosens when tail end is pulled.
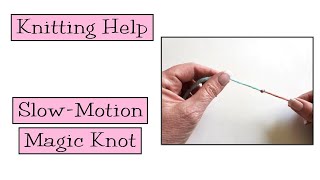
Knitting help - slow motion magic knot
You should wrap the loop around the first two fingers on your non-dominant hand. 2. Pull up a loop. Slide your crochet hook under the two loops of your double ring closest to your fingertips. Grab onto the working end of the yarn and pull it back through to the right, creating a loop on the hook.

How to tie a magic knot — create laugh grow
When I knit, I do it knitting into the back leg which is closer to the point of my needle. And when I purl, I do it from the front, with the leg on front being closer to my knitting needle in both cases holding my yarn with my left hand. I think my style of knitting is the uncrossed knit.

Pin on crochet
How to join yarn with the magic knot • free tutorial by ...

How to make a magic no-ends knot
How to join yarn in crochet: 4 ways
How to execute the magic knot for joining yarn 🧶 clear instructions and demonstration
How to join yarn with the magic knot • free tutorial by ...
![tutorial] Magic Knot in 6 Easy Steps! Knotions Magazine ...](https://i.pinimg.com/originals/51/88/fe/5188fec6d74e1398261c5f92157550c1.jpg)
Tutorial] magic knot in 6 easy steps! knotions magazine ...
Crochet basics: the magic knot | bella coco
Beginner's guide to knitting in the round with the magic loop ...

How to join yarn with the magic knot • free tutorial by ...

How to tie the magic knot (russian knot) - dora does

Magic knot - the easiest way to join a new ball of yarn in ...

How to tie the magic knot (russian knot) - dora does
Magic knot for knitting
![tutorial] Magic Knot in 6 Easy Steps! Knotions Magazine](https://knotions.com/wp-content/uploads/2016/09/pinterest-magic-knot.jpg)
Tutorial] magic knot in 6 easy steps! knotions magazine

How to tie a magic knot — create laugh grow

Pin by angela myles on knitting class | magic knot, yarn ...

3 ways to join yarn - crystals & crochet | magic knot ...

41+ built in outdoor planter ideas and diy projects - bilimsi ...
How to join yarn with the magic knot • free tutorial by ...
How to: the magic knot (yarn join) | easy tutorial by hopeful honey

Knotted threads and yarn: the magic knot
How to tie the magic knot (russian knot) - dora does

Magic knot - the easiest way to join a new ball of yarn in ...

How to join yarn two ways - magic knot and russian join - you ...
![tutorial] Magic Knot in 6 Easy Steps! Knotions Magazine](http://knotions.com/wp-content/uploads/2016/09/magic-join-7.jpg)
Tutorial] magic knot in 6 easy steps! knotions magazine
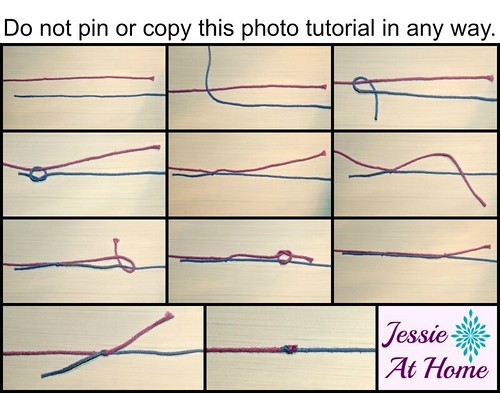
Magic knot - jessie at home
How to join yarn with the magic knot • free tutorial by ...

How to tie the magic knot (russian knot) - dora does

Magic knot - the easiest way to join a new ball of yarn in ...
0 Response to "41 magic knot knitting diagram"
Post a Comment